No ‘Ho-Ho’ in Your Tannenbaum?
The Do’s and Don’ts to Decorating the Perfect Christmas Tree
Tree-trimming: it used to be a favorite past time; the family gathered to inaugurate the holiday spirit, rechristening the living or family room with festive décor and some communally shared cheer and eggnog. As a child I lived for this moment all year long. As a young adult I became something of an expert at Christmas staging. By the time I was twenty I was decorating others’ homes as well as my own, and, by the age of thirty I could confidently refer to myself as a master of the art and craft; achieving virtually any theme under budget and on time.
Now, far be it from me to suggest tree-trimming as a commando-styled exercise. It still ought to be about the joy of reuniting with beloved friends and family; everyone invested in the communal artistry of bringing sparkle to the bleak winters’ nigh. But realistically, who has time anymore? Alas, for most, the season creeps up almost unexpectedly and with the prospect of entertaining a houseful of guests, the concept of having a well-turned out home decked to the nines almost always results in tree-trimming becoming as a very solitary pre-celebratory chore, and not altogether an enjoyable one either. Because time is so limited, pausing even a moment from the daily grind to decorate a tree can just seem a superficial exercise in the art of time-suckage.
The very good news here is that depending on the lavishness of the accouterments, tree-trimming can be expedited almost down to a science. So let’s begin. Most artificial tree construction today is ‘umbrella-based’; meaning a bottom, middle and top that simply snap together with ease, the branches pre-attached and fanning out from a central hub. So, plunking an artificial tree into its base is likely the easiest part of your task.
A few tips: make certain the base is sturdy and secure; the post tightened evenly between its fasteners. Also, you will want to fan-out the branches once you have separated them from the hub. You can use either a clothes steamer or just a kettle to liven up matted spruce needles. It may sound like a waste of time, but actually steaming will freshen up the look of branches that have been squished into a box under the stairs for the last nine months. Also, some trees today are advertised as ‘shed-less’; meaning the amount of bristles dirtying up your carpets and floor is considerably less from those artificial ‘pine needle-based’ trees of only a few previous years that left a puddle of leftover greenery scattered everywhere and destined to clog up your vacuum cleaner.
Now, if you are new to tree-trimming and starting from scratch I still tend to gravitate to two basic choices in tree color: either green (of varying shades, flocked or not) or white (either pure or with a feathered silver). White trees were introduced back in the late seventies as an alternative to green, and apart from the necessity to use lights strung from a white (as opposed to green) cord, as white is a neutral, pretty much the whole palette of colors is available to you. In more recent times tree colors have exploded with some truly ‘interesting’ forays into yellow, pink, black, silver and orange. But be wary. While trees of these varying shades may seem trendy and fun, your choices of viable ornaments to go on them will be severely limited in most cases, or produce an effect that may look great this year, but severely date by this time next year. Ultimately, you want to stick with the basics in tree color; changing up the decorations rather than the tree from year to year.
The most labor-intensive part of any tree trim is lighting.
It’s also the easiest to do badly. We’ve all seen them; those Charlie Brown-esque trees, unloved and sporting mismatched strands of lights, unceremoniously shoved, tied and/or knotted into crooked branches with all the finesse of a well-used Tim Burton chew toy; some twinkling/others not…or worse; burnt out or random twinkling at different times to create a frenetic light show about as appealing as a break-dancing chicken with Tourette’s. There is no economy in skimping on your lighting. And do not be naïve to think your lack of finesse here will ‘come together’ once you have tucked, hanged and otherwise adorned the tree with all your other decorations combined. The human eye is drawn to light at a glance. It will see your mistakes as well as your virtues.
While there are various ‘pre-lit’ options available today, personally I am not a fan of any of them; the lights too dispersed to offer the attention-grabbing sparkle and glow all good tree-lighting should, and with the added hindrance of ‘what to do?‘ when a chord becomes frayed or worse, shorts out, leaving half your tree in the dark. Lighting is a pain, but properly done, it can also provide your Christmas fir with glitz and glamor. I prefer clear, warm-white lights to the current strain of cool-blue LED’s or multi-colored sets. Twinkle lights are definitely an option. But avoid the strands that come with those annoying little ‘control boxes’ offering ‘multi-function’ capabilities.
Why? Well, when plugging more than two strands together you will find the ‘multi-function’ between sets never properly aligns. So, while one row of lights is strobing to the point of inducing a seizure, the other set is clumsily random twinkling, while the third is on all the time, and the fourth is blinking on and off and…well…you get the picture – not pretty! Again, you want uniformity in your lighting. Why no multi-colored lights? Personal preference, I suppose: but warm-white mini-lights will cast a more appealing natural glow on the ornaments you hang on the tree afterwards, showing them off to their truest native color and advantage.
The most expedient way to light an artificial umbrella tree is from the bottom up, beginning at the center pole, weaving the cords in and out between each and every offshoot and sprig, twig and otherwise shaped branch extension, pulling down one layer of branches at a time from the center, steaming them out, and then beginning the process of wiring and lighting anew; running up and down each branch twice, always jumping from branch to branch and row to row from the center, not the outer parameter. As you are wiring your tree, take a moment to point all of the lights upwards and forwards where they can produce the maximum amount of glow. Repeat this process over and over again, one layer of branches at a time until you have reached the top of the tree. All of your plugs should be securely fastened to the inner pole or stalk of the tree. You can use twist ties, floral wire or other fasteners here.
There is both an art and a science to hanging the rest of your decorations.
You want to evenly distribute everything, dispersing the decor so that no two of the same style are close together, but also so that every spot on the tree is filled. But before you even begin to adorn your tree with glitter and gold – or silver and red for that matter – you will want to unplug your tree. NEVER decorate a bare tree with the lights turned on. Why? Again, the human eye is drawn to light. Light is beautiful but it is also distracting, particularly if it is twinkling, blinking or otherwise creating a light pattern. However, even stationary lights draw the eye away. And right now, you want your eye to be concentrated on creating evenly distributed and dispersed décor. You can do this much more efficiently with the Christmas tree lights turned off!
Floral or berry twigs are a great way to ‘fill’ the larger spaces that may appear on lower branch layers. Try compensating for the areas of lesser space the high up you go, by using smaller sprigs of the same style, or, by separating branches from these larger sprigs that can be easily placed inside the upper branches. Ultimately, you want to balance the visual weight of these larger pieces so that the tree acquires a visual uniformity from top to bottom. Top-heavy decorations make the upper half of your tree appear lopsided and/or cluttered, while the bottom half looks just right.
Conversely, small accents near the bottom can make a tree look empty and bare, even as they provide the perfect complement for the upper extremities. Sprigs should always be laid on top of branches; if these sprigs contain poinsettias or other floral/fruit based foliage, then fan them out to fill in the existing space. Depending on the length of the sprigs used you will definitely want to nestle them closer to the center tree stalk, alternating sprigs on every other branch to avoid conformity while still achieving a sense of uniformity.
Separate all of your remaining tree décor from your sprigs at the outset. Then, separate the remaining décor on a counter top or nearby table, taking a quick visual inventory of how many pieces of each style you have to spread around the rest of the tree. Start hanging what you have the most of first until the tree begins to look full, making certain you are evenly distributing the ornaments. Do not hang multiple ornaments at a time. Rather exhaust your surplus of one type or style first, leaving room for tweaking later on, before continuing to the next style of ornament and the next and so on. This is the best way to achieve a desired layering effect. If you have any decorations left over you may want to give your tree the once over at the end and see if you can feather in any extras to fill in holes between your branches.
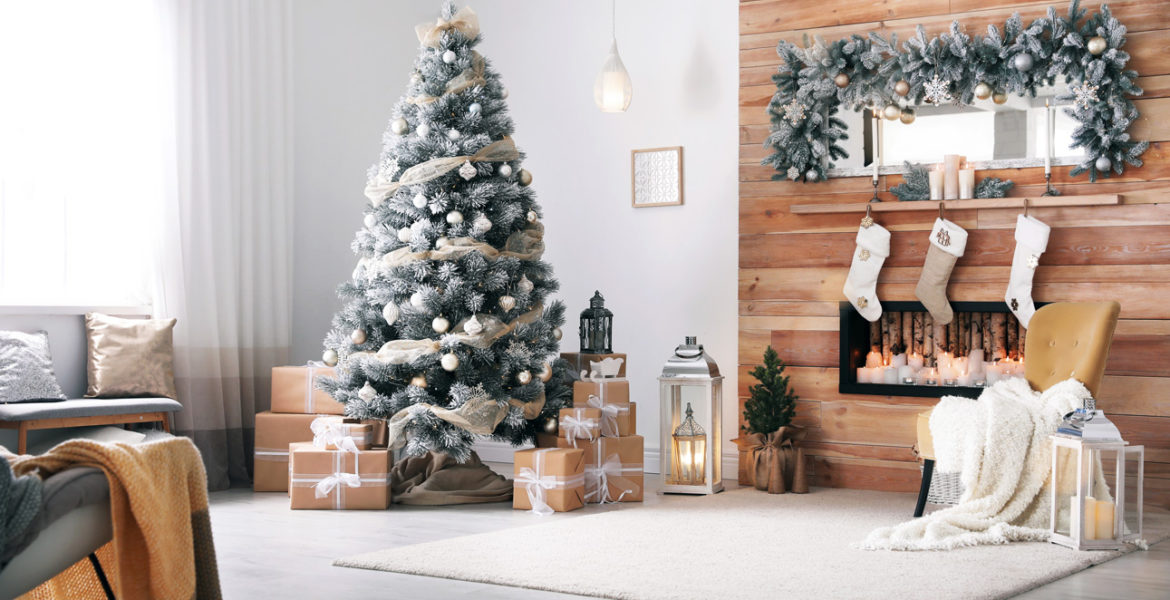
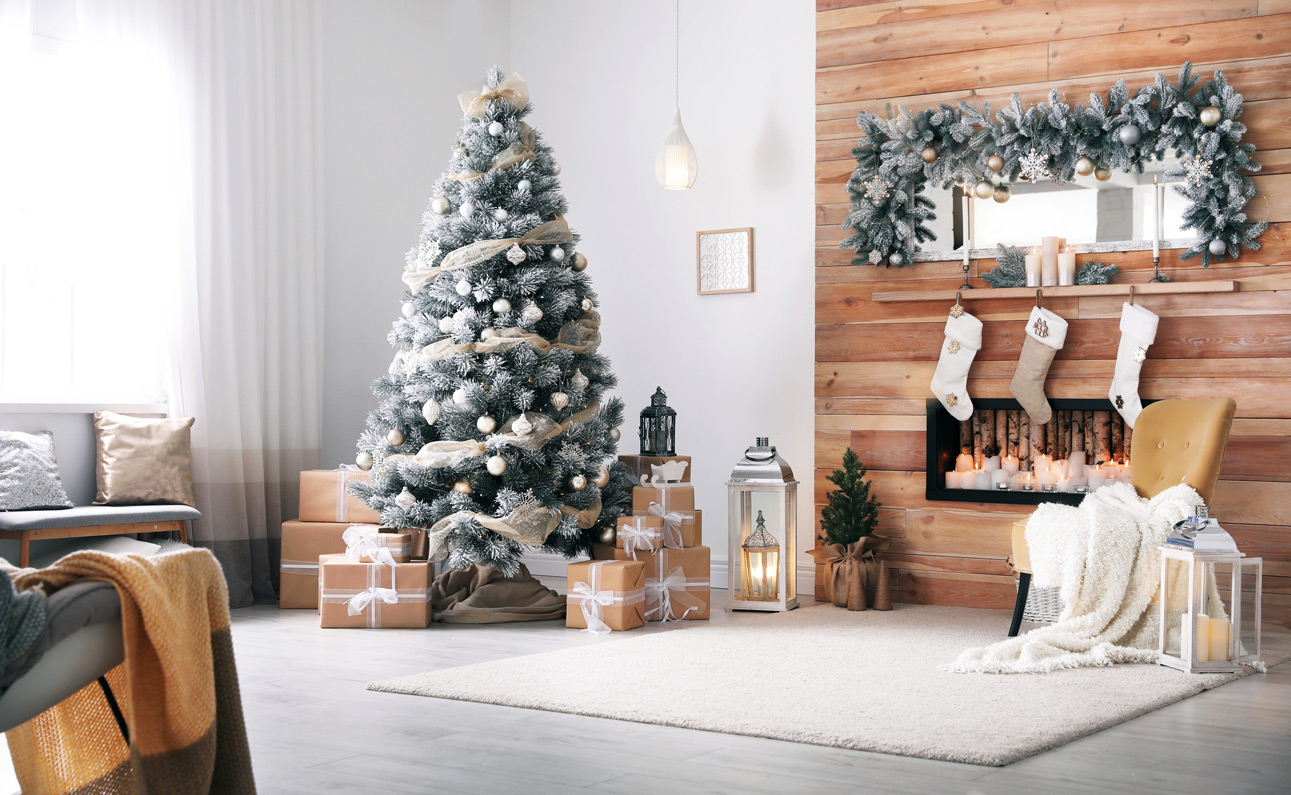
It has become the trend to create ‘theme’ trees that coordinate with the decor in the room
For some years now, it has become the trend to create ‘theme’ trees that coordinate with the decor in the room the tree is being set up. And while no one can argue a tree with silver decorations would look spectacular next to a navy-blue settee and grey/black wing-backs, so too would a gold and black, or red velvet and silver ensemble. When it comes to Christmas staging, traditional red and green decorations still command the floor. And there is absolutely nothing wrong with that. But keep in mind there are many alternatives at your disposal. Just as with choosing the right colored furniture to go with your walls is of paramount importance in your home decor, tree-staging is all about the tree and not its surroundings, per say. So, if you would prefer to stage a sage green ten-footer, draped from tip to toe in lime green, royal blue and yellow accouterments, with clear-glass balls and silver-tipped snowdrops and icicles adorning every branch, then do it. Take the plunge. As long as the colors ‘go together’ on the tree, they will almost always be afforded ‘forgiveness’ if they are not entirely a compliment to the furniture and fixtures within the room itself.
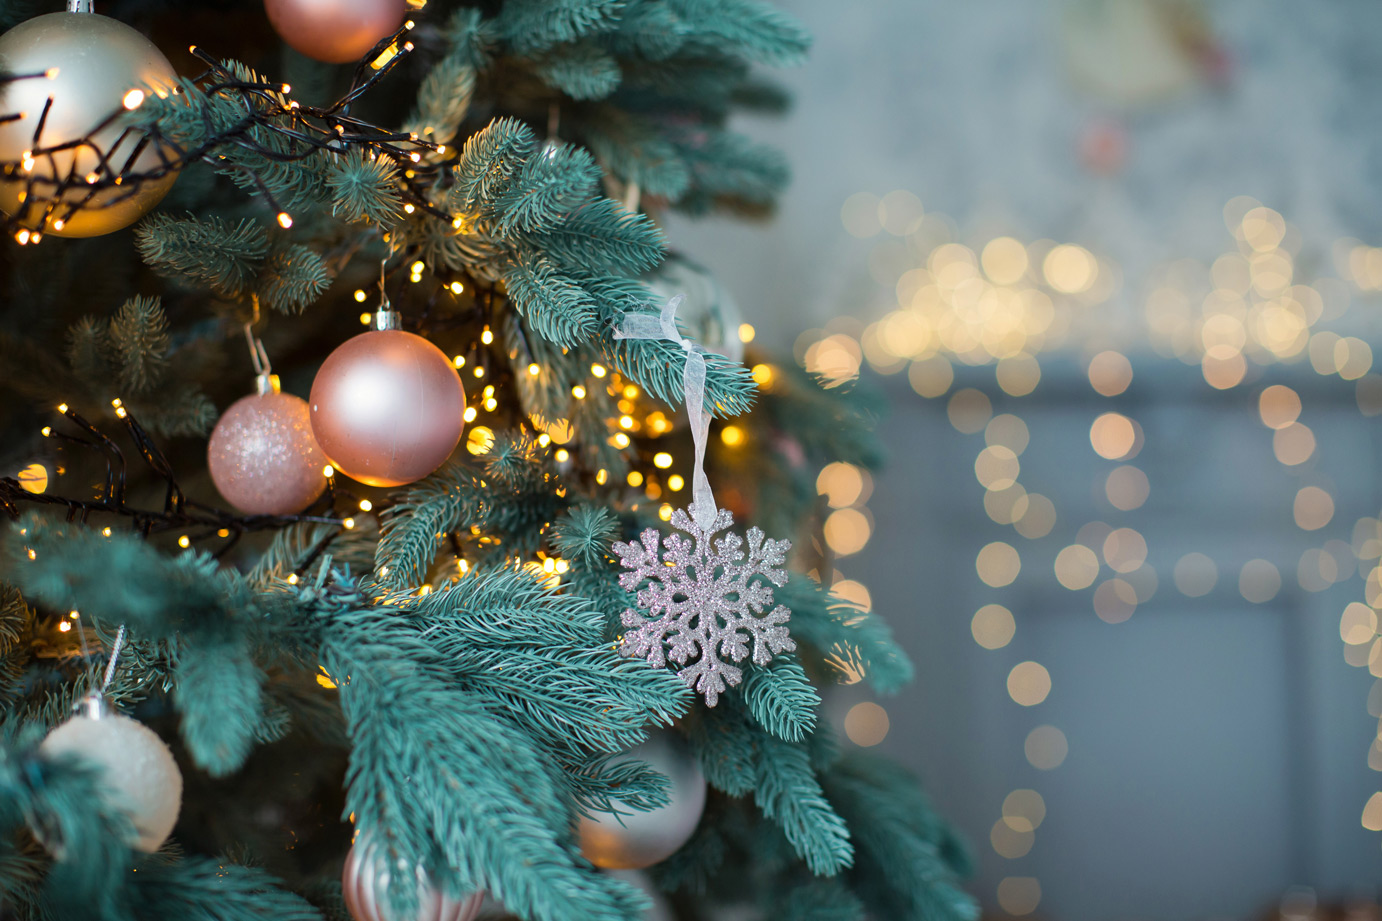
Add an edge with festive sparkle, sprinkled snow, tinsel or other lightly dusted glitter
When it comes to giving your tree that added edge in festive sparkle, sprinkled snow, tinsel or other lightly dusted glitter should always be applied last. Just remember, such add-ons are meant only to augment and garnish the look of all your hard work; not bury it beneath a dense coating of gaudiness. There are plenty of different ways to garnish a tree. You can do a tree all in glass balls. Solid bright colors, in various sizes, all round, can really make a tree pop. Group two, three or even four balls of varying sizes and colors together with floral wire, creating your own ball sprig. You can also string the balls together as a rope or mini-garland, like popcorn, creating either horizontally or vertically arranged streaks and swags of balls.
You can also do an entire tree in sprigs, crystals and cardboard figurines. As before, themed trees were very popular several decades ago, matching your home décor with the ornaments on your tree. But nothing speaks more to the traditions of Christmases past than a tried and true scheme of reds, golds and silvers. One of the most elegant combinations of the last 20 years has been black and pewter; interspersed with glass balls that introduce a unique splash of either turquoise, plum, soft pink, or lemon yellow to the equation. Coordinating colors for a themed tree is pretty much the same as for a room. You will want to work within a particular array of hues that are complimentary to your theme. You will also want to keep this theme running throughout the rest of your holiday décor. I have oft seen a stunning array of winter white/satiny beige and gold-themed trees that positively speak to a very unique sense of uber-sophistication on par with the likes of a Manhattan hotel lobby. So, if you are going for a more formal and stately elegance then you may want to theme your tree-trimming to coincide with chichi good taste. In all things.
Christmas tree-staging can be a costly endeavor – especially for those starting from scratch. To everyone, the following advice is offered wholeheartedly: first, sometimes the simplest tree-staging is the best. You can get maximum mileage and presentation value – if not maximum bling – from a properly-lit tree with only a light dusting of sprinkle snow and a few well-placed star-cut and glass ball decorations. If you see a look you want to emulate in a catalog, DO NOT just go into the store that is selling those particular decorations. Remember, that store – especially if it’s a boutique – will likely be selling this décor at a premium. Rather, look for more economically marketed alternatives. Make the rounds. Look for bargains. They are out there. And you will be surprised how uncannily alike a lot of decorations appear, especially when you surrender the hang-up they must ‘be’ those exact decorations you were looking for in the first place. Let your creativity run wild.
Last but not least, the last thing any of us want to think about after Christmas is Christmas decorating. I mean, what’s the point? However, between Dec. 26th and the first few weeks of the New Year virtually all Christmas décor gets discounted at the store level up to 85% off its original retail sticker price. As example: I found some gorgeous boxwood wreaths at a local retailer on Boxing Week that were originally tagged at $59.99. The clearance price was $19.99! Boxes of glass ornamental balls in assorted colors, retailing for $39.99 when they were arranged on store shelves back in November hit the register on Dec. 28th at $5.99 a box. Berry and poinsettia sprigs that sold for upwards of $11.99 a pop rang in on Jan. 4th at .85 cents a cluster.
Yes, I still spent over $200.00 during my post-Christmas décor shopping spree. But my total at pre-Christmas prices would have capped off at $1179.98 – 5X as much!!! So, if you still want those expensive decorations but didn’t want to pay the equally as stylish original price, you may discover exactly what you are looking for, for next year’s tree at the end of this year. Buy it and file it away with the rest. You will be very glad you did your homework a year from now when you have the swankiest Christmas spread in town. Be smart. Shop smart. And don’t smart from the spank of realizing you spent far too much on this most joyous of holiday activities. So, enjoy the journey. But expect the results. You’ve earned them!
By Nick Zegarac
Coulter’s Furniture